Are you longing for something sweet? A delicious cake to be precise? If there is one thing that most of us trying out during this lockdown, is cooking! And what could be better than some simple recipes to keep you busy? So, we, at Icinginks are sharing two really amazing lockdown cake recipes with you all that you can try at home.
Easiest Ever Double Decker Cake
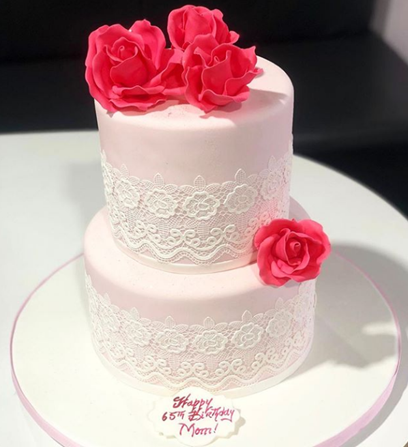
Take the stress out of making a lavish cake with this cake recipe that bakes all at once from the easy mix. We have used pink color frosting but you can choose the decoration to suit your taste.
 Ingredients
- 12 large eggs
- 750g self-raising flour
- 750g golden caster sugar
- 200ml vegetable oil
- 350g butter, softened, plus extra for the tins
- 3 tsp baking powder
- 3 lemons, zested
For the buttercream
- 500g butter softened
- 1kg icing sugar
- 3 tbsp milk
- 2 lemons, zested
- Edible color
For the filling
- 2 lemons juiced
- 300g lemon curd
• Place the baking parchment and in the two cake tins and butter the bases and sides every well. Pre-heat oven to 190C. Mix all the ingredients in a freestanding mixer or electric hand whisk until it turns smooth.
• Pour 1 kg batter in the 25cm cake tin. Do the same with the 20cm tin and pour in the rest.
• Bake the cakes in the oven for an hour. To check whether it is properly cooked, insert a skewer into the middle of the cake. If it comes out clean that means it's cooked. Cool the cakes in their tins for at least 10 minutes, then place onto the racks to cool completely.
• To make the buttercream, take butter into pieces, add about 1/3 of the icing sugar, and beat well with a mixer or hand whisk to combine them very well. Once you fully combine the mixture add the next 1/3and beat again. Now add more sugar, Pink Edible Art Decorative Cake Paint, milk, and lemon zest and keep beating until the batter become pale. To make the filling, mix the lemon curd together in another bowl and keep aside until required. If needed you can add more edible food coloring as well.
Assembling the Cake
• Cut the tops and cut both sponges in half using a serrated knife. Spread over half of the filling on the top of the larger piece and the rest over a smaller one. Leave it for 5 mins. Spread buttercream over the filling on the larger piece and place another on the larger sponge on top. Do the same with the smaller pieces.
• Stick the cake onto the cake board using a small drop of the buttercream under each piece. Spread some of the remaining buttercream all over the tops and sides of both cakes in a very thin layer – this will bind with loose crumbs to create an undercoat for your chosen decoration. Keep them aside for one hour to firm up.
• To stack the cakes, push a straw into the center of the bigger cake. Cut the top off with scissors so that it is mantle with the buttercream layers.
• Place 5 more straws around central part, equally spaced apart. Next place the smaller cake carefully on the top to spread the rest of the buttercream all over the surface to cover it. Viola! Your cake is ready.
Vanilla Rainbow Layer Cake
 Source: euphoric_cakes
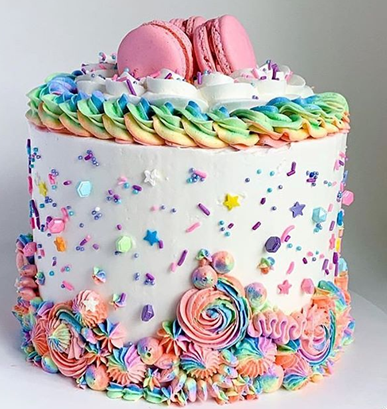
You will be proud of yourself to make and serve this cake to your family and friends. This vanilla rainbow layer cake is surprisingly easy to make, thanks to a little help from Icinginks Edible Art Paints. It’s a moist, delicious cake that’s easy to make and perfect for a celebration, and kids birthday party cake
Ingredients
- 3 cups (390g) all-purpose flour
- 3 tsp baking powder
- 1 tsp salt
- 3/4 cup (168g) butter
- 1/4 cup (60ml) vegetable oil
- 2 cups (414g) sugar
- 4 eggs
- 1 tbsp vanilla extract
- 1 1/3 cups (400ml) buttermilk
Method
• Prepare three 8-inch cake pans with parchment paper circles in the bottom and grease the sides. Preheat oven to 176°C.
• Add the flour, baking powder, and salt in a medium-sized bowl and set aside.
• Mix unsalted butter, vegetable oil, and sugar in a large bowl and beat them together until it becomes fluffy and light in color. Put two eggs at a time and mix until well combines.
• Now, add the vanilla extract and then eggs.
• Add half of the dry ingredients to the batter and mix until combined. Now add the buttermilk and mix until well combined.
• Mix the remaining dry ingredients and mix until well combined and smooth. Scrape down the sides of the bowl as needed to be sure all ingredients are well incorporated.
• Take the batter in two 6 different bowls.
• Add edible icing color to the bowls (one color per bowl) and mix nicely. You should have one bowl each of purple, blue, green, yellow, orange and red.
• Add the colored batter to the cake pans starting with the purple. After purple add the blue, then green, then yellow, then orange and red.
• Bake the cake for at least 60 minutes, or until a toothpick inserted comes out clean.
• Remove the cakes from the oven and let it cool for about 10-15 minutes.
For Frosting:
• To make the frosting, add the butter to a large mixer bowl and beat until smooth. Now add about half of the powdered sugar and mix until it becomes smooth.
• Add the vanilla extract and 2 tablespoons of water or milk and mix until well combined. Now add the remaining powdered sugar and mix until well combined and smooth. Next mix additional water or milk as required to get the consistency right.
For Decoration:
• Place the first layer of cake on a cake plate or cardboard cake circle, then top it with the frosting and spread into an even layer. Now add the second layer of cake another layer of frosting. It is time to add the final layer of cake on top, then frost the outside of the cake.
• Now, divide the remaining frosting between 6 bowls. Use the gel icing colors to color each bowl of frosting, using one color per bowl. To make rainbow swirl frosting border, add each color of frosting to a zip-lock bag.
• Fold the clear wrap over into a long log. Twist one end closed and trim the other end if needed so that the frosting is right at the end. Put the log into a piping bag with the open end of the log going into the piping tip.
• Begin piping shells of frosting around the top edge of the cake. After each shell is piped, turn the piping bag just a little bit before piping the next shell. As you continue piping and turning the piping bag, you’ll get a rainbow that rotates around so you see all the colors.
• To pipe shells around the bottom of the cake, create another log of rainbow frosting, add it to the piping bag and pipe shells around the bottom in the cake manner – turning the bag slightly after each shell.
• Store cake in an airtight container until ready to serve.


 Ingredients
 Source: euphoric_cakes